
Hardwood Floor Damage: Refinish, Replace, or Redo?
Quick Answer: Surface scratches and dull finish are refinish-fixable. Deep gouges or water stains usually need board-level replacement. Widespread cupping, buckling, or a floor already sanded to its limit means it's time to start over.
Every time a hardwood floor gets sanded, it loses a small amount of wood it can never get back, and that one fact decides more about a damaged floor's future than the damage itself does. A solid floor's reserve above its tongue-and-groove joint typically runs somewhere around three-sixteenths to a quarter inch once the finish layer is gone, and each full sanding eats into that fixed amount permanently. A floor that still looks fine after its fourth or fifth refinish could already be one sanding away from its limit, whether or not anything on the surface gives that away. Engineered hardwood carries an even thinner reserve: its wear layer sits on top of a plywood or fiberboard core, often only a couple of millimeters deep, and some engineered products were never designed to be sanded at all.
That limit is only part of the picture. Damage on an existing hardwood floor takes different forms, and not every mark calls for the same response. Some come out with an afternoon of sanding. Some require pulling a handful of boards and blending new wood into the field around them. And some point past both options toward tearing the floor out entirely. Sorting out which category a problem falls into, before committing to a plan, determines whether the repair solves it or delays a bigger one.
The Sanding Limit: Why a Hardwood Floor Can't Be Refinished Forever
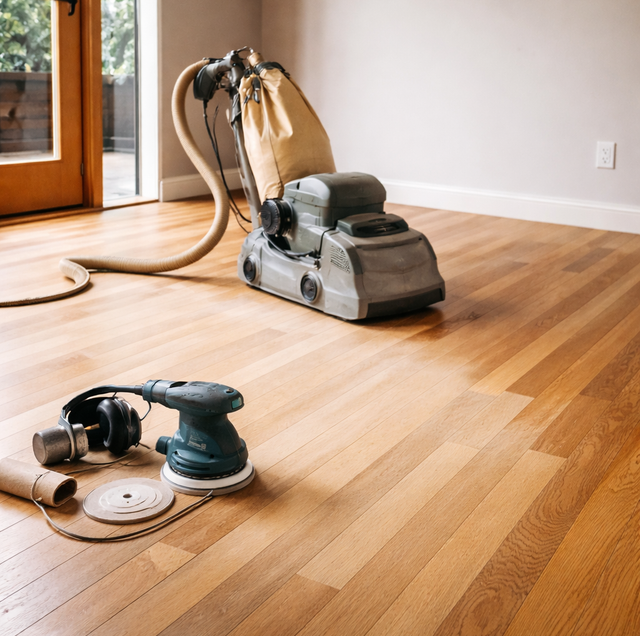
Solid hardwood strips and planks are milled with a tongue on one edge and a groove on the other, fastened down through the tongue with nails, staples, or cut nails set below the surface in older installs. The wood above that fastener line is what a drum sander removes a little at a time: coarse grit to strip the old finish, then progressively finer grits to prep for stain and topcoat. A typical 3/4-inch solid floor can usually handle around four to six full sandings over its life before the wear layer runs out and the sander starts exposing fastener heads or the tongue itself. Past that point, sanding isn't a cosmetic risk anymore; it's a structural one, since the board no longer has enough wood to hold the fastener securely or resist normal wear.
Engineered hardwood works differently. It's a thin layer of real hardwood veneer glued over a plywood or high-density fiberboard core, and that veneer defines how many times, if any, the floor can be sanded. Veneers in the 4 to 6mm range can often take one or two light sandings by a careful crew using fine grits. Veneers thinner than that, common on thinner-veneer engineered products and most floating click-lock floors, frequently can't be sanded at all without cutting through to the core, and a sanded-through spot isn't repairable the way a solid board is. Knowing which type of hardwood is underfoot, and how much sanding history it already has, is the first fork in this decision, before symptoms even enter the picture.
Where Your Damage Falls: Refinish, Board-Replace, or Start Over
| What you're seeing | Likely path | Why |
|---|---|---|
| Surface scratches, scuffs, or a dull, worn-looking finish | Refinish | Damage is limited to the finish layer; sanding and recoating restores it |
| Light discoloration from sun exposure, a rug, or pet stains that haven't reached bare wood | Refinish | Color change is in the finish or the wood's top fibers, not the board's structure |
| A single deep gouge, burn, or dent that goes past the finish into raw wood | Board-level replacement | Sanding can't remove damage that deep without weakening the board further |
| A dark water stain or cupping limited to a few boards near a known source | Board-level replacement | Wood beneath the finish has absorbed moisture; the boards themselves need to come out |
| Cupping or buckling spread across most of a room, tied to a wider moisture event | Start over | Damage is too widespread for spot repair to be practical or reliably matched |
| Boards already sanded to bare minimum, exposed fastener heads visible in spots | Start over | The wear layer is gone; another sanding isn't structurally sound |
| Floor feels bouncy or uneven under the damaged area, not just discolored | Get the framing checked first | This points to the subfloor or joists, a separate issue from the hardwood surface itself |
What Refinishing Actually Fixes
Refinishing removes the finish and the top layer of wood with it, so it's the right call for anything cosmetic rather than structural. Scratches from furniture legs or a dog's nails, the dull, foot-traffic-pattern wear common in hallways and by a kitchen sink, and light sun fading where a rug used to sit are all textbook refinish jobs. A screen-and-recoat, roughing up the existing finish and applying a fresh topcoat without removing wood, can handle very light wear without using any of the floor's sanding reserve, worth asking about before assuming a full sand-down is necessary.
Not-too-deep gouges: A scratch that hasn't broken through the stain into the raw wood, and doesn't leave a groove you can feel with a fingernail, usually sands out in a standard refinish pass. The dividing line is depth, not visibility: a light scratch still within the finish layer disappears with the rest of the surface; one cut into the wood grain itself often leaves a shallow low spot even after sanding.
When Board-Level Replacement Is the Right Call
Board-level replacement means pulling specific damaged boards, cutting them free from the tongue-and-groove of their neighbors, and fitting new boards into the gap. It fits when damage is confined but too deep or structural for sanding to fix without weakening the floor further.
Isolated water damage: A boot tray by a door, a plant pot without a saucer, or a slow appliance leak can soak a few boards until they cup, crown, or darken while the rest of the room stays unaffected. If the wet boards are limited to that footprint and the moisture source has been found and stopped, cutting out and replacing just those boards is usually more practical than resurfacing the whole room. Wood that's absorbed water repeatedly loses structural integrity even if it eventually dries and looks normal again.
Deep gouges, burns, or pet damage: A dropped cast-iron pan, a fireplace ember, or a large claw gouge can go deep enough that sanding it out would thin the surrounding boards to level one spot. Cutting the affected board and splicing in new wood keeps the rest of the floor's wear layer intact.
A section with structural cupping: Boards cupped (edges higher than the center) in a limited area, not the whole room, sometimes point to a persistent moisture source, like a slab missing a vapor barrier under one corner, or a nearby plumbing fixture. Once that source is corrected, replacing just the cupped boards addresses the damage; sanding them flat without fixing the moisture usually brings the cupping back.
When It's Time to Start Over
Full replacement makes sense when the damage is too widespread, or the floor itself has too little wear layer left, for a targeted repair to hold up.
Widespread cupping or buckling: Cupping across most of a room, or boards that have buckled and separated from the subfloor, usually points to a larger moisture event: a flood, a long-term humidity imbalance, or a subfloor that was never properly acclimated before the original install. Board-by-board replacement across that much square footage rarely makes sense, and the new boards would likely face the same conditions that damaged the originals.
A floor already sanded to its practical limit: If a previous refinish already came close to exposing fastener heads, visible faintly through the finish as small dark dots, another full sanding isn't a safe option. Patching what can be patched, or replacing the floor, are the realistic choices; a fresh sand-down isn't one of them.
Structural subfloor movement: If the damage sits over an area where the floor itself is soft, sloped, or bouncy underfoot rather than just discolored or scratched, that's a framing or subfloor problem, not a hardwood-surface one, and it needs to be resolved at the structural level before any refinishing or board replacement is worth doing on top of it. Fixing the surface over an unstable base just means redoing the work later.
The Color-Matching Challenge of Board-Level Replacement
Replacing individual boards fixes the structural problem, but color is its own challenge, worth understanding before expecting an invisible repair. Old hardwood develops its color through more than the original stain: years of UV exposure, foot-traffic burnishing, and natural oxidation of the wood shift the tone gradually, a process that takes years to develop and can't be replicated overnight on a brand-new board milled from a different tree.
A skilled flooring technician manages this with a few specific techniques rather than a single stain match. Custom stain mixing, blending two or more colors and testing on scrap from the same species first, gets closer than any single can off the shelf. Feathering the sanding and finish beyond the replaced boards, working a gradient several boards out from the patch rather than a hard edge, helps the transition read as gradual rather than a visible seam. Matching the topcoat's sheen matters just as much as the color: a satin finish next to a semi-gloss patch looks mismatched even with a dead-on stain.
Set the right expectation up front: Even excellent color-matching work rarely produces a repair that's completely invisible, especially on a floor with years of sun-faded patina, and especially under angled light or direct sunlight where any transition tends to show. A good match reads as intentional and blended under normal living-room lighting; it isn't the same as replacing the board with a time machine. Homeowners who understand that going in are almost always satisfied with the result; those expecting the repair to vanish completely sometimes aren't, through no fault of the work itself.
Frequently Asked Questions
Often yes, if they're sanded and finished together as one continuous job rather than room by room. Sanding both areas down to bare wood in the same pass, then staining and coating them at the same time with the same batch of product, resets the color difference that built up from separate aging. Trying to match an already-finished older room to a newly refinished one after the fact is much harder than doing both at once.
Yes. Quarter-sawn boards show a straighter, tighter grain than plain-sawn boards from the same log, so a replacement needs to match cut style, not just species and stain, or the grain itself will stand out even under a perfect color match. Reclaimed boards from the same era, when available, blend far more convincingly than new-milled stock of the same species.
Look closely at a spot near a heat register or under a rug that's been moved recently: small, evenly spaced dark or metallic specks peeking through the finish are often fastener heads close to the surface, meaning very little wear layer is left above them. A floor with visibly thin, glass-like buildup and no remaining texture from the original milling is another visual cue that it's been sanded multiple times already.
It's possible with careful feathering, working the sanding out in a gradient rather than stopping at a hard line, but it's harder to do invisibly than a board-level patch since refinishing affects a larger visible surface. It works best when the untouched area isn't heavily sun-faded or worn differently than the repaired section; a big contrast in existing wear makes the blend line more obvious no matter how careful the sanding is. A partial refinish also needs a natural stopping point, a doorway, a transition strip, or a change in flooring material, to hide where the sanding ends; stopping mid-room on an open floor plan with no visual break tends to leave a line that's obvious no matter how good the feathering is.
Rarely. Most floating engineered floors carry a thin wear layer because they're built for easy installation and removal, not long-term resurfacing, and a drum sander risks cutting straight through the veneer into the core in one pass. Glued-down or nailed-down engineered floors with a thicker veneer sometimes tolerate one light sanding, so installation method and veneer thickness both need checking first. Checking the manufacturer's spec sheet or the leftover box label, if either survived the original install, is the most reliable way to confirm veneer thickness before assuming any floating floor can be sanded, since many manufacturers void the product warranty the moment a sander touches the surface regardless of how thick the veneer actually measures.
Yes, and the diagnosis details matter for scope, not just repair type. A soft spot confined to roughly a single 16- or 24-inch joist bay, one that firms up as soon as you step past it in any direction, usually points to one failed joist or a section of subfloor sheathing; the repair typically has to extend to the nearest solid framing member on each side of the damage, not just the visible dip, since sistering or replacing a joist needs to land on sound wood. A softness that runs in a straight line the length of a room, with the low point centered under a load-bearing wall or beam above rather than in the middle of a joist span, points instead to a sagging beam or settling foundation, a larger repair than a single joist bay. Where the dip's low point sits relative to the walls above and below is often the first clue a foundation contractor uses to tell the two situations apart before opening up the floor.
Every hardwood floor carries its own repair history, whether or not the paperwork survived it: how many times it's been sanded, where water has reached it over the years, which boards were already swapped out by someone else long before the current owner moved in. That history, more than how bad a single scratch looks under kitchen light, decides whether the next step is a can of finish, a handful of new boards, or a full tear-out. Reading it correctly before starting work keeps a repair from becoming the first step toward a bigger one.
Get your hardwood floor damage assessed — a technician can tell you whether it's a refinish, a board-level repair, or time to start over, and what that means for the rest of the room. Precision Home Worx serves Wilmington, Bear, and Newark. Call (302) 500-3676.


