
How to Prep an Older Home for Winter: An 8-Step Checklist
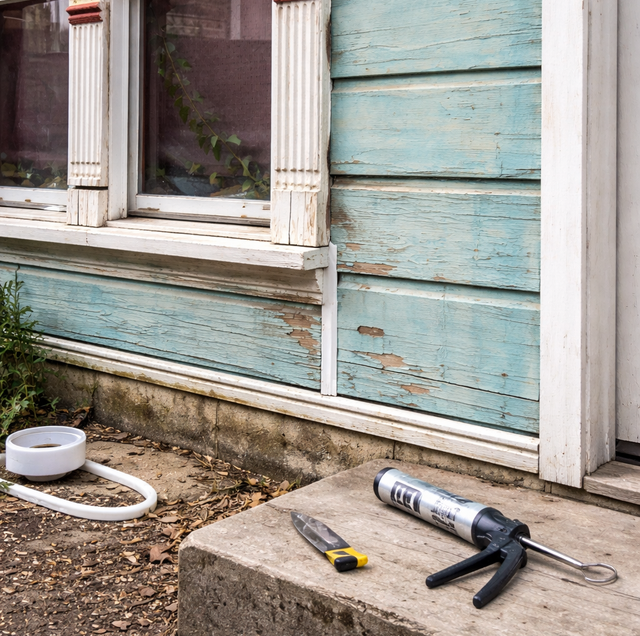
Run a hand along a baseboard in an older house on a still day, and it's easy to feel nothing. Run it along the same spot when the wind picks up, and a cold thread of air shows up out of nowhere. Nothing about the wall changed between those two moments — the gap was there the whole time. Wood trim, door jambs, and window sashes in a house built decades ago have been swelling and shrinking at slightly different rates for years, and the small separations that create don't announce themselves until moving air or a big temperature swing pushes through them.
Wood trim, door jambs, and window sashes swell when humidity climbs and shrink back when it drops. Mortar joints, old caulk, and weatherstripping flex along with them, and each cycle asks the material to return to its original size. Most don't. A joint that closed tight ten summers ago is often a hair wider now, and a house that's been through decades of that cycle, plus a few generations of owners patching and re-siding over the original seams, accumulates far more small openings than a house built last decade to one continuous air barrier.
Cold weather doesn't create these gaps. It exposes them. Once the temperature difference between inside and outside grows large enough, air starts moving through every opening at once, pulled by what building scientists call the stack effect: warm air rises and escapes high in the house, and cold air gets drawn in low to replace it. Summer heat and humidity do their own damage in the meantime, swelling wood shut, softening old caulk, and then letting everything shrink back looser than before once the air dries out. Winter is simply the season that makes the sum of both cycles obvious.
That's why this checklist isn't a countdown to the first freeze. Whatever the calendar says when you're reading this, the gaps you'd catch in October are already there in April, just quieter. Go through the list well before the season turns, and you're fixing causes instead of reacting to a cold room.
Quick Answer: Older homes develop more air leaks over time as wood movement and aging caulk open gaps a newer envelope doesn't have. Check trim, doors, windows, soffits, and decks, and do it anytime, not just before winter.
Why Older Construction Opens Up Faster
Homes built before continuous house wrap and taped seams relied on layers, plaster, sheathing, siding, and trim to loosely close gaps rather than one engineered barrier to stop air movement. That approach worked well enough when it was new. Decades later, after settling, multiple re-roofing and re-siding jobs, and rooms that were added, remodeled, or rewired at different times, the house has dozens of seams where two eras of construction meet and were never fully tied together. None of that means the house is failing. It means it needs a periodic walk-through to find and close the gaps a newer build wouldn't have in the first place.
The 8-Point Prep Checklist
1. Feel for air movement around the exterior envelope: Run the back of your hand slowly along window and door trim, sill plates, dryer vent covers, and the spots where a hose bib or electrical line passes through the wall. A lit incense stick works even better than your hand: smoke that wavers or gets pulled sideways is marking a real leak. For gaps wider than about a quarter inch, a foam backer rod set behind the bead holds better than caulk alone, since the rod stops the bead from bridging a gap it can't actually fill. Narrower gaps take caulk alone. Any spot where old caulk has pulled away from both sides instead of just one is worth a full recaulk pass rather than a patch.
2. Check every exterior door's sweep and threshold: The rubber or vinyl sweep along the bottom of the door compresses over years of use and eventually stops touching the threshold at all. Close the door on a sheet of paper at several points along the bottom edge; if you can pull the paper out without tearing it, the seal has failed there. Adjustable thresholds usually have small screws that raise the sill slightly to meet a worn sweep, but on an older aluminum threshold that has pitted or warped, adjustment alone won't fix it, and the sweep or the whole threshold needs replacing.
3. Test window locks and check the glazing: On a double-hung window, the sash lock isn't just security hardware; it pulls the top and bottom sashes together into a compression seal. A lock that doesn't fully engage, or one where the two sashes still have visible play once it's latched, is leaving a gap along the whole meeting rail. On original wood-frame windows, also look at the glazing putty holding each pane: putty that has cracked, pulled away, or gone chalky and crumbly no longer holds the glass tight against the sash and should be reglazed or the sash inspected by someone who repairs older wood windows.
4. Inspect soffit, fascia, and trim for gaps or soft wood: These are the boards that box in the underside and edge of the roofline, and on an older home they take the brunt of ice, condensation, and years of paint cycles. Press a screwdriver tip gently into any spot that looks discolored or swollen; wood that gives instead of resisting is already absorbing moisture. Gaps where soffit meets fascia, or where either has pulled away from the wall, let moist air track down into the wall cavity behind it, which shows up later as a stain or musty smell nowhere near the roofline itself. This is soffit, fascia, and trim work, not shingle or full roof replacement, and it's worth catching before a small gap becomes a rot repair.
5. Walk the deck or porch and check the ledger board: The ledger is the board that bolts the deck to the house, and it's one of the few structural connections exposed to weather on both sides. Look for a gap opening up between the ledger and the siding, rust streaks running from the fasteners, or a slight give when you press near the bolts. Freeze-thaw cycling in the ground under the footings can shift a structure just enough over the years to open that seam, even when the framing itself is sound. Check deck fasteners for corrosion at the same time; a handful of rusted screws is a quick fix, but a ledger that's separating from the house is a structural issue, not a cosmetic one.
6. Insulate exposed pipes and find your shutoffs: Any plumbing running through an unconditioned crawlspace, basement rim joist, or garage benefits from foam pipe sleeves, which slide on in minutes and are cut to length with a utility knife. While you're down there, locate the main water shutoff and every exterior hose bib shutoff and make sure the valve handles actually turn; a corroded valve you can't close in an emergency defeats the purpose of having one. If your water heater is more than a few years old, a quick look at the anode rod and the drain valve for mineral buildup is worth doing on the same pass, before it starts making noise.
7. Test exterior GFCI outlets and entry lighting: Every exterior outlet should have a GFCI with a working test and reset button; press test, confirm the outlet cuts power, then press reset and confirm it returns. A GFCI that won't reset needs replacement, not repeated testing. This is also a good time to check motion sensors and timers on entry and walkway lighting, since shorter daylight hours make functioning exterior lighting matter for safety, not just convenience, for a good stretch of the year.
8. Seal the attic access hatch or pull-down stair: A standard attic hatch is often a significant uninsulated opening into an attic, and it's easy to overlook because it's rarely opened. Add a foam weatherstrip gasket around the frame where the hatch meets it, and if the hatch cover itself has no insulation on top, a rigid foam board glued or screwed to the attic-side face closes that gap for good.
Work through the list in an afternoon or spread it across a couple of weekends. None of these steps depend on the season outside; they depend on when you last checked.
Frequently Asked Questions
Building professionals measure this with a blower door test, which pressurizes the house with a calibrated fan and clocks how much air escapes per hour. You don't need the equipment for a rough sense: feel for moving air at trim, outlets, or the attic hatch on a calm day, and if your hand picks it up, that's a real leak, not just an impression.
Caulk over failing caulk almost never bonds, since the new bead sticks to a surface that's already peeling. Cut out loose or cracked caulk with a utility knife or a caulk-softening gel, wipe the joint with denatured alcohol to remove residue, and let it dry fully before running a new bead; skipping the cleanup step is the most common reason a fresh caulk job fails within a season.
In a single-story home, the stack effect runs on the temperature difference between the attic and the living space instead of between floors, so it's weaker than in a two-story house but doesn't disappear. It's also amplified any time a bath fan or clothes dryer runs without makeup air, since exhausting air out one point pulls outside air in through every gap at once, the same net effect a taller stairwell produces with more floors to drive it.
If the sash and glazing are sound, a storm window or interior storm panel adds a second air gap that measurably cuts heat loss without disturbing the original window, which is often the better move than replacing character windows that still function. It won't match the performance of a new insulated unit, but it closes most of the gap for a fraction of the disruption.
Once a year catches major issues, but weatherstripping and caulk on an older home are worth a faster recheck, roughly every six months, since the same expansion and contraction cycle that opens gaps in the first place also loosens fresh seals faster than it would on newer materials.
Yes. Close all the doors and windows, then run the range hood and one or two bathroom exhaust fans for a few minutes on a still day; depressurizing the house this way turns a weak leak into an obvious draft. Run your hand along outlet covers, baseboards, and window edges while the fans are still on, and gaps that were too faint to feel before become easy to find. A full-house exhaust fan or blower door gives a more precise reading, but this version works for a rough DIY check.
Get a full exterior and envelope check before the next season change — one visit covers caulking, doors, windows, soffit, and more. Precision Home Worx serves Wilmington, Bear, and Newark. Call (302) 500-3676.


