
How to Re-Caulk a Tub or Shower for a Watertight Seal
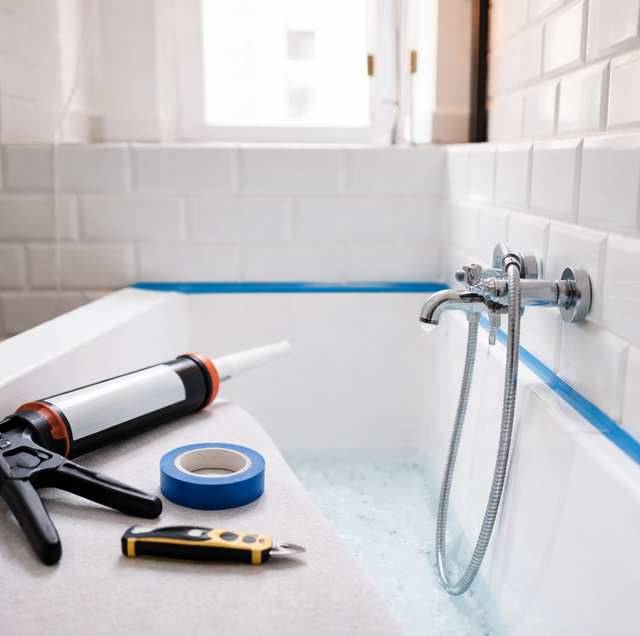
The thin line of caulk where your tub meets the wall, or where the shower base meets the tile, is doing more work than it looks. That bead is the only barrier sealing the gap between two surfaces that expand, shift, and get soaked every day. When it cracks, peels, or turns black with mold that won't scrub off, water stops running down the drain and starts running behind the wall instead. Behind the tile, it finds framing, drywall, and subfloor, none of which are meant to stay wet. Left alone, a failed bead the width of a pencil can feed rot and mold that costs far more to fix than the joint itself.
Re-caulking is one of the most useful repairs a homeowner can learn, but it rewards patience over speed. A bead squeezed over old, moldy, or damp caulk will peel again in months. Done in the right order, on a clean and fully dry joint, a fresh seal holds for years.
Quick Answer: Cut and scrape out every bit of the old caulk, clean and dry the joint, kill any mold, fill the tub with water so the gap sits at its widest, then run one smooth bead of 100% silicone or kitchen-and-bath silicone and tool it. Let it cure fully before the first shower.
What the Caulk Actually Seals
Before pulling anything out, it helps to know what that bead is protecting. Tile, fiberglass, and acrylic surfaces are waterproof on their faces, but the seams where two of them meet are not. A tub sits against a tiled or paneled wall with a small gap between them. The shower pan meets the wall the same way. Grout fills the joints between tiles, but grout is porous and rigid; it cannot flex or bridge the moving gap between the tub and the wall. Caulk fills that specific moving joint.
The joint moves because a tub loaded with water and a person weighs a lot more than an empty one. Every time the tub fills and drains, it flexes down and springs back. A rigid filler would crack; flexible caulk stretches with it. That flex is exactly why the seal fails over time, and why the repair has a couple of steps most people skip.
Signs Your Caulk Needs Replacing
Caulk rarely fails all at once. Watch for these:
Cracks or a split running along the bead: A hairline crack is enough for water to wick through by capillary action, even if nothing pools.
Gaps where the caulk has pulled away from the tub edge or the tile. You can often slide a fingernail or a business card into the gap.
Peeling or rubbery lifting. Old caulk that has lost its grip lifts in strips or rolls up when touched.
Black or pink staining that won't clean off: Surface mildew wipes away with a bath cleaner. Staining set deep into the caulk, or coming back within days of cleaning, means the mold has colonized the caulk itself, and the bead has to go.
Water showing up where it shouldn't, like a damp spot on the ceiling below the bathroom, a soft baseboard next to the tub, or a musty smell near the wall. That points to water already getting behind the seal.
If the caulk is intact and only surface mildew shows, a good cleaning may buy time. Once it is cracked, peeling, or stained through, cleaning is a bandage, and the bead needs to come out.
Choosing the Right Caulk
The single most common mistake is using the wrong product. A wet joint that flexes needs a sealant built for both water and movement.
100% silicone is the standard choice for a tub or shower joint. It stays flexible for years, bonds tightly to tile, glass, fiberglass, and acrylic, and does not absorb water. Look for one labeled for kitchen and bath, or one that specifies mildew resistance, which means it carries an additive that slows mold growth on the cured surface.
Kitchen-and-bath silicone or a siliconized formula sold for wet areas works when it is truly a wet-area product, not a general-purpose acrylic.
What to avoid: a painter's acrylic latex caulk with no silicone content. It is fine for baseboards and trim, but in a constantly wet, flexing joint it shrinks, cracks, and grows mold quickly. Read the tube; if it does not say it is rated for tubs, showers, or wet areas, it does not belong here. One trade-off worth knowing: pure silicone cannot be painted over, so if you ever plan to paint the bead, a paintable siliconized product is the compromise.
Removing All of the Old Caulk
This is the step that separates a repair that lasts from one that fails by spring. New silicone will not bond to old silicone, soap scum, or mold. Every trace has to come out.
Soften and cut: Run a sharp utility knife or a plastic caulk-removal tool along both edges of the bead to release it from the tub and the wall. A dedicated caulk-removal tool has an angled blade that rides the joint without gouging the surface. Work slowly; a utility knife will happily slip and cut a finger, so keep your free hand clear of the blade path and wear gloves and eye protection.
Pull and scrape: Once both edges are cut, the old bead often peels away in a long strip. Scrape any remainder with a plastic scraper or the removal tool. For stubborn residue, a silicone caulk remover (a solvent gel) softens it; give it the dwell time on the label, then scrape. Open a window and run the exhaust fan while using any solvent, and never combine it with other cleaners.
Leave zero residue: Run your fingers along the joint. If you feel any rubbery film, it is still there. A haze of old silicone is enough to keep the new bead from sticking. Wipe the cleaned joint with rubbing alcohol on a rag to lift the last of the residue and any oils.
Cleaning, Killing Mold, and Drying
If you use a diluted bleach solution to treat mold, ventilate the room and never mix bleach with ammonia or any other cleaner, because the combination releases toxic gas. Wear gloves and keep the fan running.
Here is the part people rush: the joint must be bone dry before caulk goes on. Silicone will not cure or bond against moisture trapped in the seam. Give it several hours, or overnight, and aim a fan at the joint if the bathroom stays humid.
While the joint is open, look at what the old caulk was hiding. Clean tile and a firm substrate are good news. Mold growing on the drywall or backer board behind the tile, a spongy feel when you press the wall, or dark, crumbling material is a red flag. That is water damage the caulk was masking, and a fresh bead over rot only hides the problem while it spreads.
Caulking the Joint the Right Way
Fill the tub with water first: This is the trick most tutorials skip. A tub full of water sits at its lowest point, which opens the joint to its widest. Caulk it empty and the bead cures narrow; the first time you fill the tub, the gap widens and can tear the new seal.
Fill the tub to its normal use level before you caulk, since the loaded weight opens the joint to its widest so the cured bead flexes within range instead of tearing the first time you fill it.
Tape for clean lines: Press a strip of painter's tape along the tub edge and another along the wall, leaving a gap the width you want the finished bead. Tape gives crisp edges and a professional look, especially on a first attempt.
Run one steady bead: Cut the nozzle at a 45-degree angle to a small opening, load the tube in the gun, and pull it along the joint in one continuous, even pass. Steady pressure and steady speed matter more than going fast. Keep enough material to fill the gap without overflowing it.
Tool it smooth: Drag a caulk-finishing tool or a gloved fingertip along the bead in one pass to press it into the joint and shape a slightly concave surface. Concave sheds water. Do it once; repeated passes drag and lump the silicone.
Pull the tape immediately, while the caulk is still wet, lifting it away from the fresh bead at a low angle. Waiting until it skins over will peel the edge.
Let it cure fully: This is where haste undoes the whole job. Most silicone needs the time stated on the tube before water exposure, often around 24 hours, sometimes longer in a humid room. Cure time is not the same as the surface feeling dry to the touch. Read the label and keep the shower dry until the clock is up. Drain the tub only after the bead has cured.
When It Is Past Caulk and Needs a Pro
Fresh caulk seals a sound joint. It cannot fix what is already broken behind the wall. Call a professional when the signs point past the surface:
A wall that feels soft, spongy, or gives when you press it near the tub means the substrate is water damaged. A leak that keeps returning after a clean re-caulk means water is entering somewhere else, often a bad shower pan, failed grout over a larger area, or a plumbing joint. Loose or drummy-sounding tiles, a persistent musty smell, or staining that spreads on the ceiling below all point to a problem inside the assembly, not on its face. In those cases, a new bead of caulk is cosmetic, and a repair pro needs to open the area, dry it out, replace the damaged material, and rebuild the waterproofing before any sealant goes back.
Frequently Asked Questions
A properly applied silicone bead in a home bathroom typically holds five to ten years. Households that shower heavily or run a poorly vented bathroom see it fail sooner because constant moisture feeds mildew at the surface. Wiping the joint down after showers and running the exhaust fan for fifteen minutes afterward stretches its life considerably.
No. New silicone does not bond to cured silicone, so a fresh bead laid over the old one grips only at the thin edges and peels within months. The old bead also traps any mold and moisture underneath, which then grows through the new layer. Full removal is the only approach that lasts.
Grout is a rigid cement-based filler for the fixed joints between tiles; caulk is a flexible sealant for joints that move, like where the tub meets the wall or where two walls meet in a corner. Using grout in a moving joint cracks it, and using caulk between wall tiles looks wrong and can trap moisture. Corners and the tub-to-wall seam get caulk; the tile field gets grout.
For a standard tub used for baths or a heavy acrylic unit, yes, because the loaded weight opens the joint to its widest and the cured bead then flexes within range. For a rarely-filled shower stall or a tub that only ever sees standing showers, the gap barely moves, and the water-fill step matters less, though it never hurts. When in doubt, load it.
Persistent black growth on new caulk usually means one of three things: the joint was not fully dry when sealed, so mold started underneath; the product was not mildew-resistant; or the bathroom is under-ventilated and stays damp. Confirm you used a bath-rated silicone, verify the exhaust fan actually vents outside rather than into the attic, and keep the joint dry between uses.
A quality kitchen-and-bath silicone works for the tub, sink, and most wet-area seams. The toilet base is a special case: many plumbers leave a small unsealed gap at the back of the toilet's floor joint on purpose, so a hidden leak from the wax ring shows on the floor instead of pooling unseen beneath a fully sealed base. Check local practice before sealing a toilet all the way around.
Skip the guesswork on a leak-prone bathroom — get a watertight seal done right the first time. Precision Home Worx serves Wilmington, Newark, and Hockessin. Call (302) 500-3676.


